
The photos in the bottom of a drawer never have just one problem. The paper has gone yellow, there's a crease running through somebody's face, the corner tore off years ago, and the whole thing was black-and-white to begin with. Four separate problems stacked on one small square of paper.
The old ways of fixing that were both slow. Take it to a restoration studio and you pay per photo and wait a week. Do it yourself in Photoshop and you're cloning out scratches, masking faces, and hand-painting color onto skin for an hour or two — per photo. Neither one works if you have a shoebox of them.
There's a shorter path now. Upload the whole scan, describe what you want fixed in plain English, and GPT Image 2 handles the scratches, the missing corner, the lost detail, and the color in a single pass. It takes about half a minute.
This guide is the working version of that: the exact prompt, three variants for specific kinds of damage, and the part nobody tells you about — what to do when the model gets a face wrong. Everything here runs in our old photo restoration tool, which lands you in edit mode with the prompt already filled in.
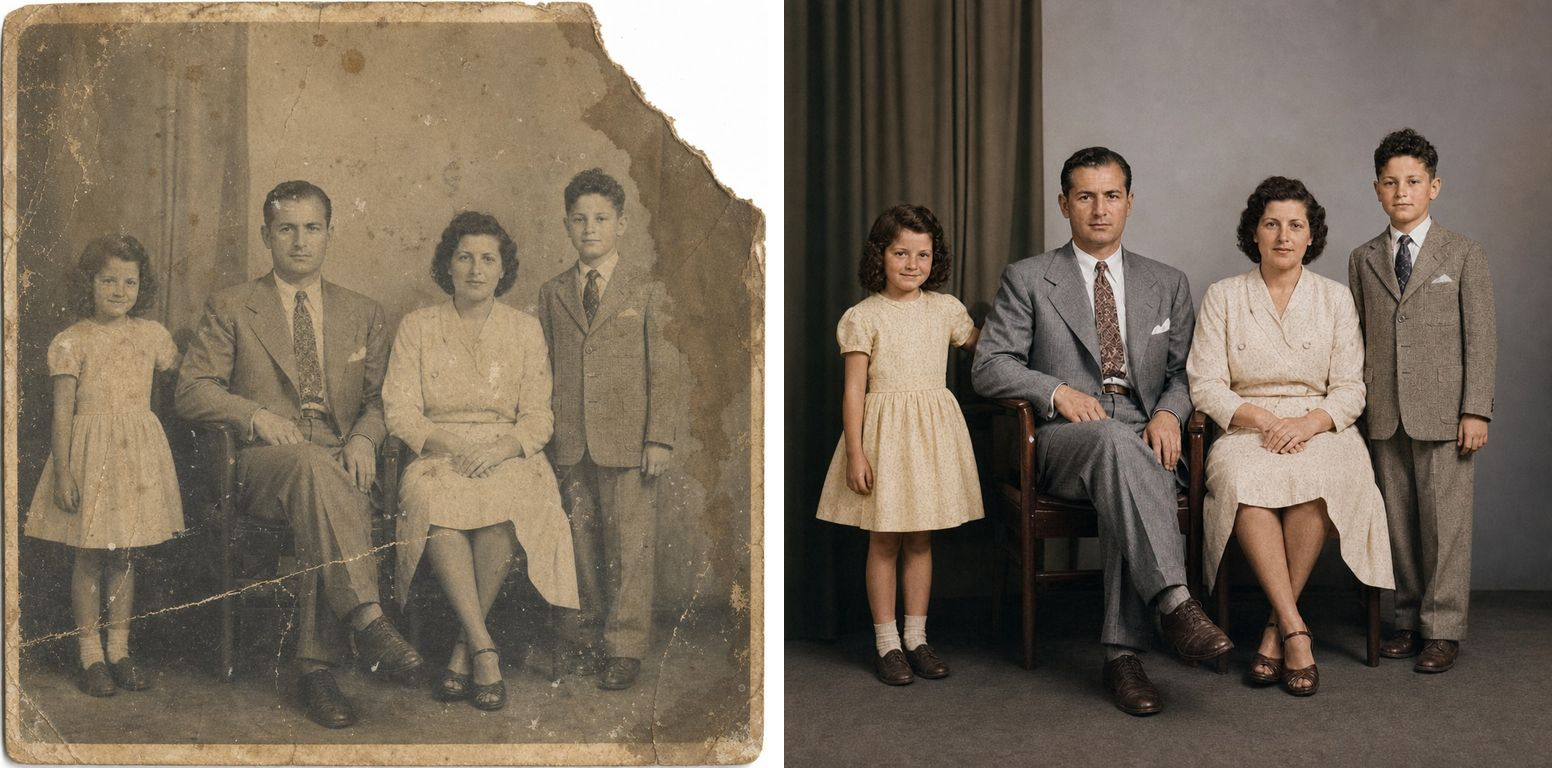
The only hard part is keeping the person
Everything else in photo restoration is solvable. Scratches are easy. Fading is easy. Even a missing corner is mostly easy, because there's usually enough surrounding wall or curtain or sky to work out what belonged there.
The hard part is that the face has to stay the same face.
This is where most AI photo tools quietly fail. They smooth the skin, straighten the nose, open the eyes a little wider, and hand you back a beautiful stranger who has your grandmother's haircut. Technically an improvement. Emotionally worthless — nobody wants a restored photo of someone who isn't quite their grandmother.
So the single most important thing you will do in this whole process is tell the model, explicitly and more than once, that it is not allowed to redesign anybody. Every prompt below carries that instruction. Don't delete it.
Before you upload: get the scan right
The model can only work with what you give it, and ten minutes of care here saves a lot of re-rolls later.
Scan it if you can. A flatbed scan at 600 DPI beats a phone photo every time, because the model gets real paper texture instead of your camera's noise reduction guessing at it.
If you're photographing it, kill the glare. Lay the print flat, use indirect daylight near a window, and shoot straight down. No flash — a flash on glossy paper burns out a patch of the photo, and the model will faithfully restore the burned-out patch as a blank area.
Crop off the album border first. White paper edges, corner mounts, and album adhesive all compete for the model's attention. Crop down to just the photograph so the prompt budget goes to the faces instead of the frame.
One photo per run. Group portraits are fine — the model handles four faces as happily as one. But don't scan six separate prints onto one page and upload that. You'll get better results and much better control running them one at a time.
The prompt that handles most photos
Most old photos have a mix of everything, so start with the all-in-one version. Upload your scan, paste this in, generate.
Restore this old photograph.
- Remove scratches, creases, tears, stains, mold spots, and scan noise.
- Rebuild facial detail, hair, and fabric texture lost to blur or low resolution.
- Correct yellowing, color casts, and fading so the tones look natural again.
- If the photo is black-and-white, colorize it naturally for its era; if it already has color, only recover what faded.

Preserve every person's identity exactly: face shape, feature proportions, expression, hairstyle, pose, and the background composition. Keep the film grain and lighting mood of the original. Do not beautify, do not swap faces, do not re-create - restore only.
Open the restorer with this prompt loaded — then drop your scan in and hit generate.
Look at the shape of it, because you'll be reusing that shape:
- A list of what to fix. Specific damage, named. "Remove scratches" works better than "clean it up."
- A hard line about identity. Face shape, proportions, expression, hairstyle, pose, composition. Named individually, because a general "keep it accurate" is too vague to bind anything.
- A list of forbidden moves. Don't beautify, don't swap faces, don't re-create. This is the sentence that stops the beautiful-stranger problem.
Keep the aspect ratio on original. Old prints are rarely a standard shape, and letting it crop to a square will slice somebody out of the family.
Three variants for specific damage
If your photo has one dominant problem rather than a general fog of age, a focused prompt beats the all-in-one every time. Pick the one that matches.
Black-and-white you want in color
Colorizing is where results go wrong most visibly — you get radioactive skin and a dress in a color that didn't exist yet. The fix is telling the model to reason from the era and the fabric rather than picking colors it likes.
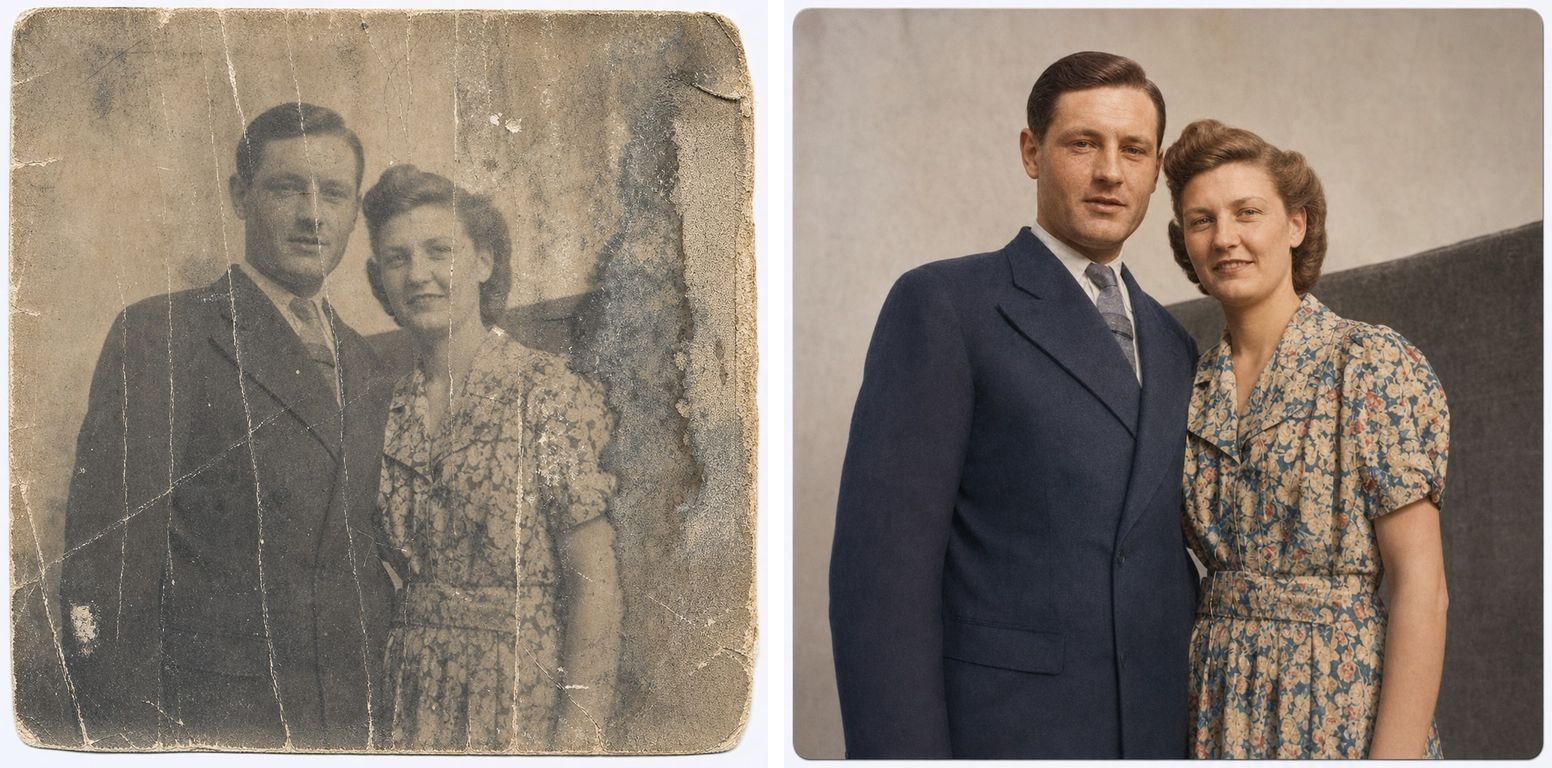
Colorize this black-and-white photograph naturally.
- Infer skin, hair, clothing, and background colors from the era, the fabric, and the lighting of the original scene.
- Keep skin tones soft and believable. No oversaturation, no neon, no plastic sheen.
- While you are at it, remove surface scratches and grain and recover lost sharpness.

Do not change any face, expression, age, hairstyle, pose, or the composition. Do not beautify anyone. Add color only to what is already there.
Colorize a black-and-white photo
Torn, creased, or missing pieces
For physical damage the instruction that matters is where to get the replacement content from. Told to reconstruct from surrounding material, the model fills the gap consistently. Told nothing, it sometimes invents a whole new background.
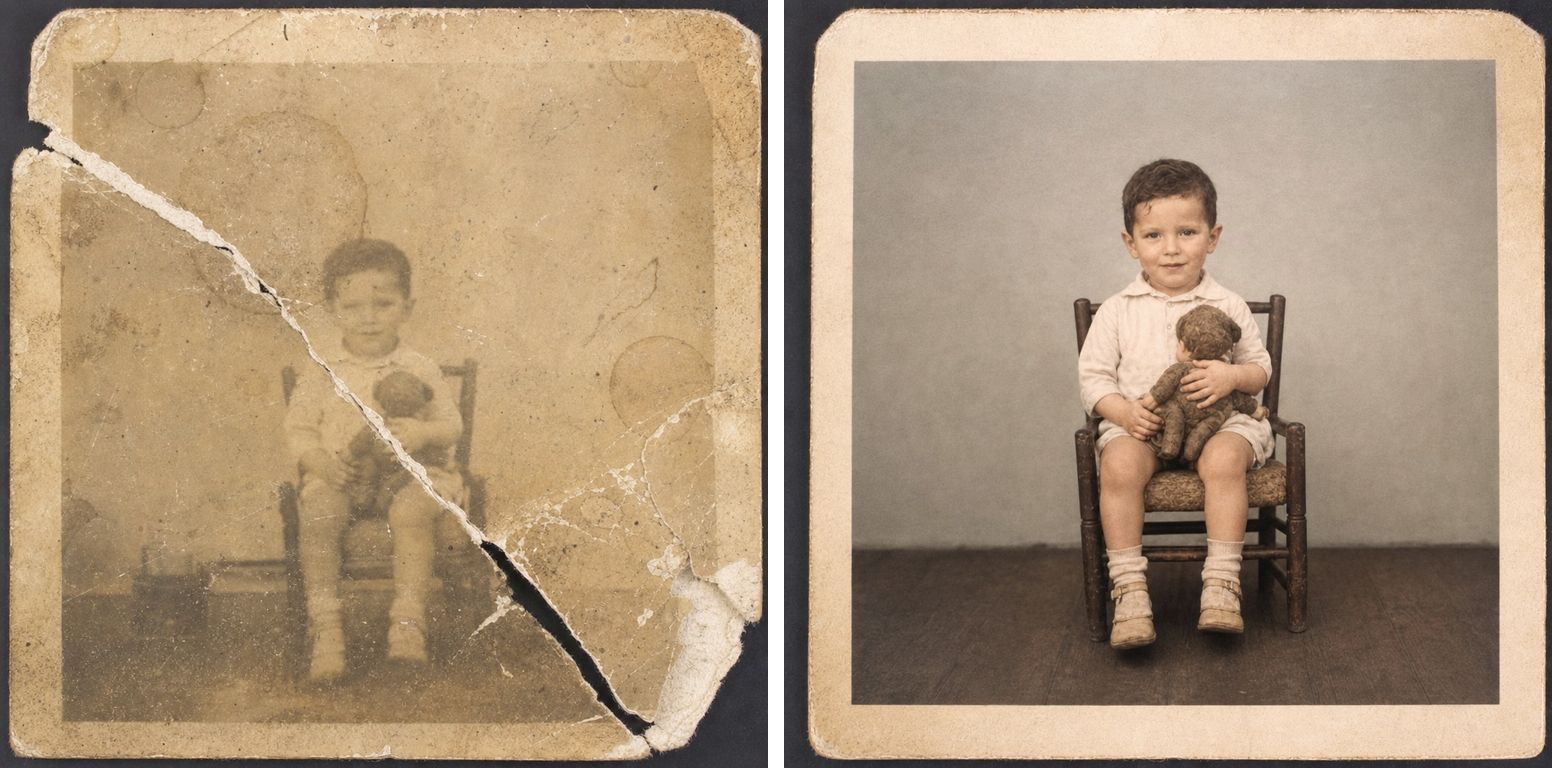
Repair this physically damaged photograph.
- Reconstruct torn edges, missing corners, and areas lost to deep creases, using the surrounding content as the reference for what belongs there.
- Remove mold spots, water stains, foxing, and yellow blotches.
- Blend every repaired area into the neighbouring grain, lighting, and shadow so no seam is visible.

Keep every person's identity, pose, and the original composition exactly as they are. Do not invent people, objects, or background elements that are not in the photo.
Repair a torn or stained photo
Blurry and too small
A soft, low-resolution scan usually means the face has lost its detail entirely. Name the features you want rebuilt — eyes, lashes, brows, hair — or the model will just sharpen the blur into a crisper blur.
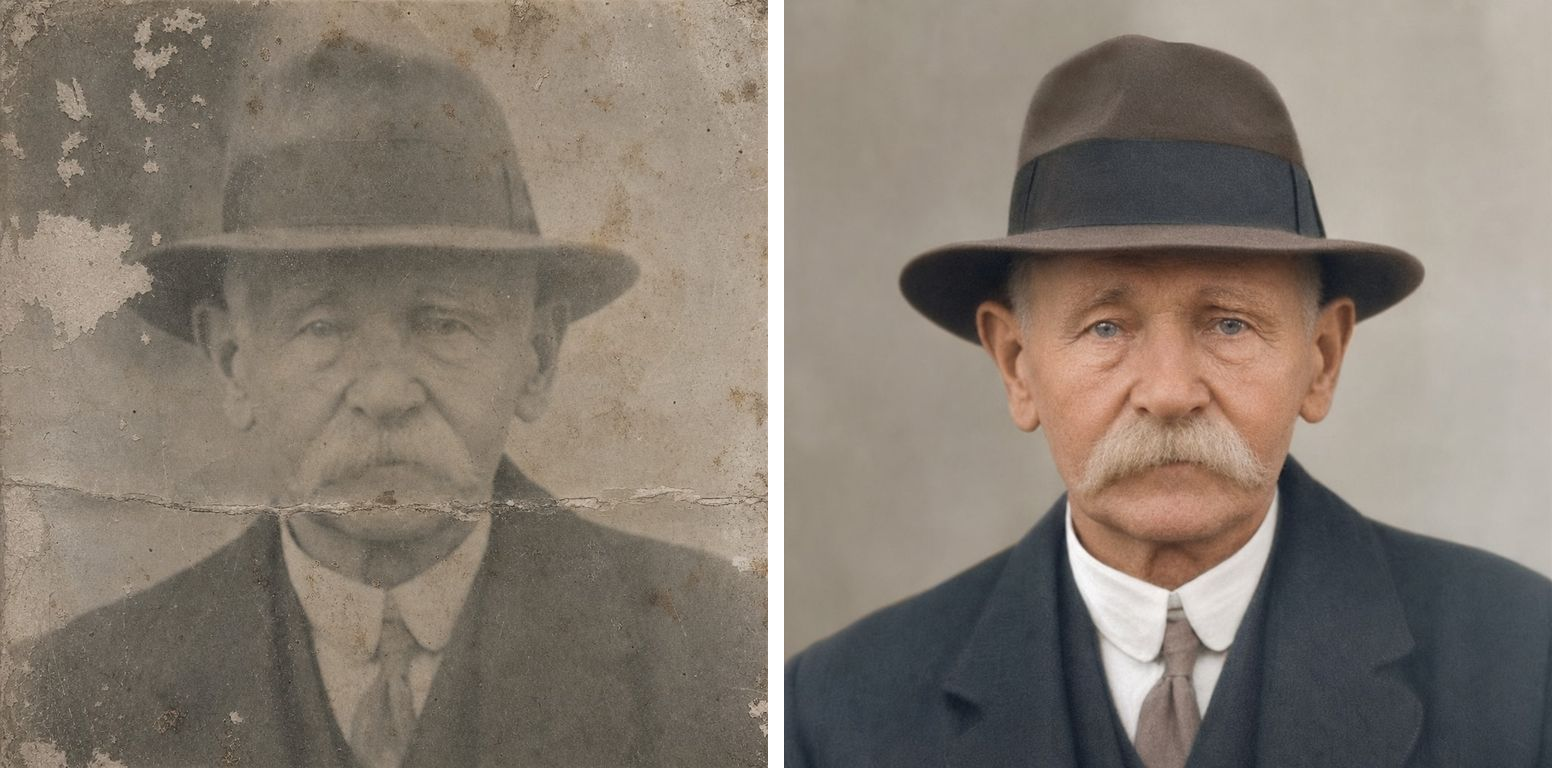
Rescue this blurry, low-resolution photograph.
- Rebuild facial detail - eyes, eyelashes, eyebrows, lips, individual strands of hair - and the texture of the clothing.
- Clear away blur, scan noise, and compression artifacts for a crisp, natural result.
- Keep the grain and the lighting mood of the original film.

Keep faces, ages, and expressions exactly the same. Do not sharpen into a hard, over-processed look and do not beautify.When it gets a face wrong
It will happen, usually on the smallest or blurriest face in a group shot. Three ways out, in order of how much you should reach for them:
Fix just that part. Keep the result and continue editing it with a narrow instruction: "Only redo the face of the boy on the right so it matches the original scan more closely. Leave everything else exactly as it is." Targeted edits are far more reliable than re-running the whole thing and hoping.
Re-roll. Same prompt, generate again. Restoration has a luck component, and the second attempt is often simply better.
Add a fact the model can't see. You know things the scan doesn't show. "The woman on the left has green eyes." "The uniform is navy, not black." "She was 19 here, not middle-aged." One correction at a time — a pile of simultaneous instructions gets you a worse result than three quick rounds.
The general rule: restraint wins. Ask for one clear change per round.
If you're going to print it
The default settings are tuned to be cheap, which is right for figuring out whether a prompt works. But a restored photo usually ends up somewhere — framed on a shelf, printed for a parent, sent to a cousin who wants their own copy.
Once you've got a version you like, switch the quality setting up to 2K or 4K and generate that one again. Higher resolution holds onto facial texture and fabric weave that gets lost at small sizes, which is exactly what shows when a photo gets enlarged for a frame. It costs more credits and takes longer, so do it once, at the end, on the version you've already approved.
Doing a whole album
The prompt is the reusable part. Once you've settled on wording that works for your family's photos — same era, same paper, similar damage — the rest is mechanical:
- Scan everything in one sitting. This is the actual bottleneck, not the AI.
- Run the batch at low quality with your standard prompt, one photo at a time.
- Keep the ones that came out right; re-roll or spot-fix the handful that didn't.
- Re-generate only your favorites at 2K or 4K for printing.
Most people find that a shoebox of forty photos yields six or seven they genuinely want enlarged. Restore all forty cheaply, print the seven properly.
What restoration can't do
Worth being straight about this, because the marketing around AI restoration usually isn't.
A restored photo is a very close reconstruction, not a recovery of lost information. When the model rebuilds an eye that was three blurry pixels, it is making an extremely well-informed guess. The result looks like the person, and the family will recognize them instantly — but it is not the original data, and it never will be.
Two practical consequences. Always keep the original scan, filed next to the restored version. And for anything with genuine historical or legal weight — identification, archival work, a documented record — treat the restoration as an illustration, not as evidence.
For the other 99% of cases, which is somebody's parents at a wedding in 1952, this is exactly what you want.
Start with a scan and the all-in-one prompt in the old photo restoration tool. If the first result keeps the faces and clears the damage, you've found your template — the rest of the shoebox costs you nothing but scanning time.
Related reading
- How to Use GPT Image 2 — Step-by-Step — the basics of generating and editing, if this is your first time here.
- What is GPT Image 2? — what the model is actually doing under the hood.
- GPT Image 2 Pricing — what a restoration run costs at each quality setting.